How to 3D Print a Multicolor Player Card
A multicolor player card is a flat 3D print where the photo, rating and name are built from several filament colors. This guide takes you from a photo to a sliced file, using the Player Card Generator and a multicolor printer.
Ideas: what to make
- A team gift: one card per player for a kids' football team at the end of the season, each with their own photo, position and rating.
- A birthday present for a sports fan, with their own photo as the star of the card.
- Awards and thank-yous: best player, most improved, a card for the coach.
- Just for fun: a card for a friend, a colleague or your pet, with a made-up rating; add a keychain hole to carry it around.
What you need
- A multicolor printer: one that can switch between 2 to 4 filaments during a print.
- 2 to 4 filament spools. PLA is the easiest to start with.
- A slicer that opens .3mf project files, such as Bambu Studio.
- A photo, ideally with a clear subject and a plain background.
Step 1: Prepare the photo
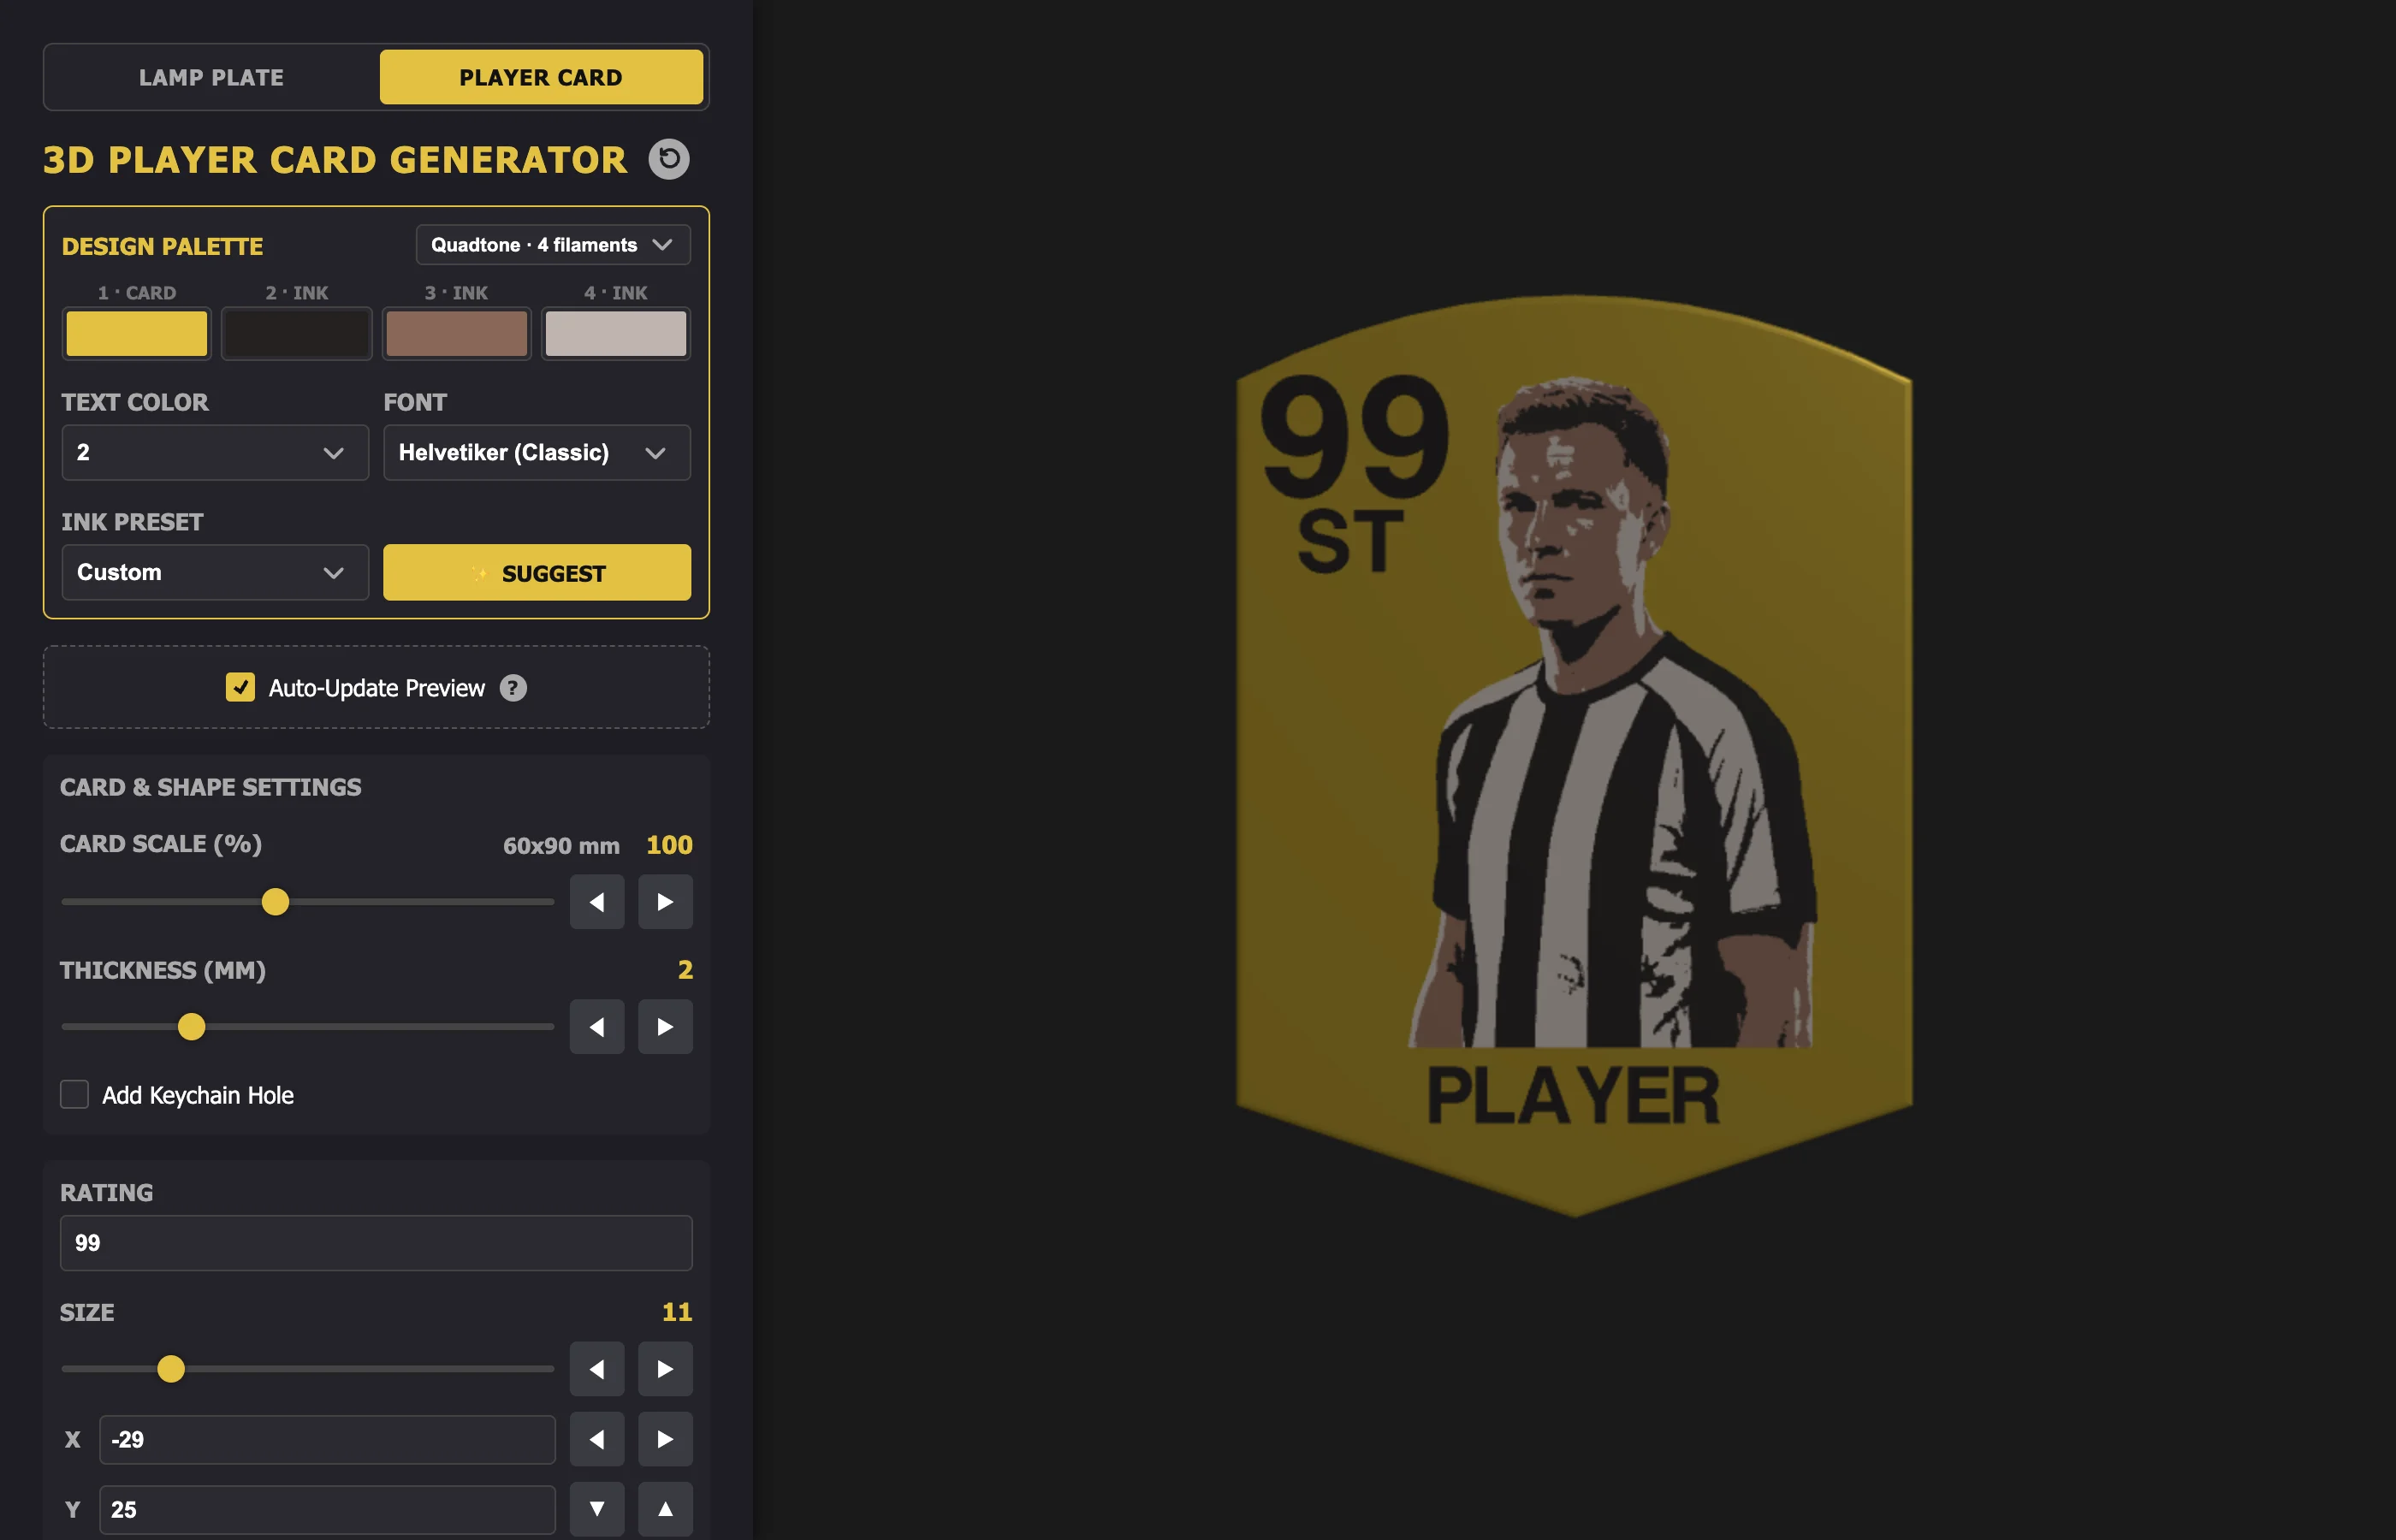
Upload your image or pick one of the examples, then crop it so the subject fills the frame. Photos with strong contrast and a simple background give the cleanest result. If the background is busy, use AI Remove BG: the AI runs inside your browser, so the photo never leaves your device, and it leaves just the subject on the card color.
Step 2: Choose your filaments
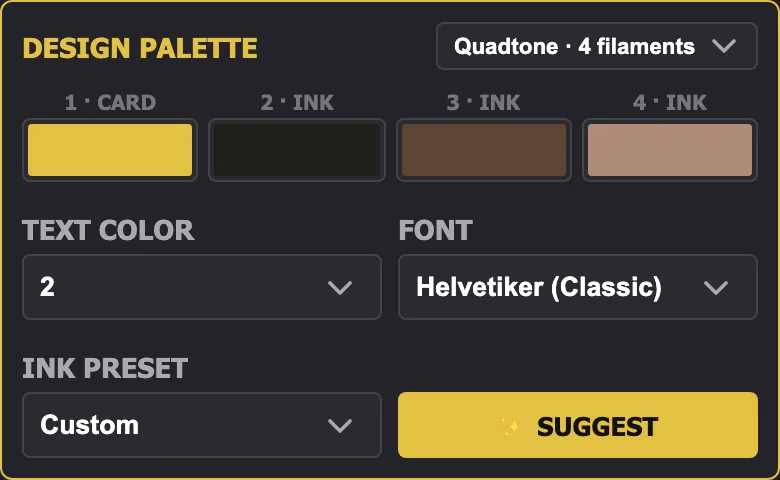
The palette has up to four slots. Filament 1 is the card color, and it is also part of the picture: pixels that match it simply show the card. Filaments 2 to 4 are the inks. Start with Quadtone (four filaments) and use Suggest to pick inks that fit your photo, or choose a preset. Fewer filaments means a faster print and less waste. The guide to choosing filament colors goes into detail.
Step 3: Pick the style and add text
Choose how the design sits on the card: Raised (the default), Inlay or Cutout; the style guide compares them. Then set the rating, position and name, choose which filament the text uses, and pick a font. Bold fonts hold up better at small sizes. A keychain hole is optional.
Step 4: Tune the image
- Algorithm: Multitone turns every pixel into the nearest of your filament colors and suits photos. The others give a graphic, two-color look.
- Dither: None gives flat, clean areas. Ordered and error diffusion mix colors with dots to imitate in-between shades, which can look busy up close.
- Brightness and contrast help when the image is too dark or flat for the palette.
- Clean-up merges tiny specks into their surroundings, because a single isolated pixel is unreliable to print.
- Resolution sets how finely the image is traced. Higher gives smoother outlines but a heavier file.
Step 5: Check the print preview
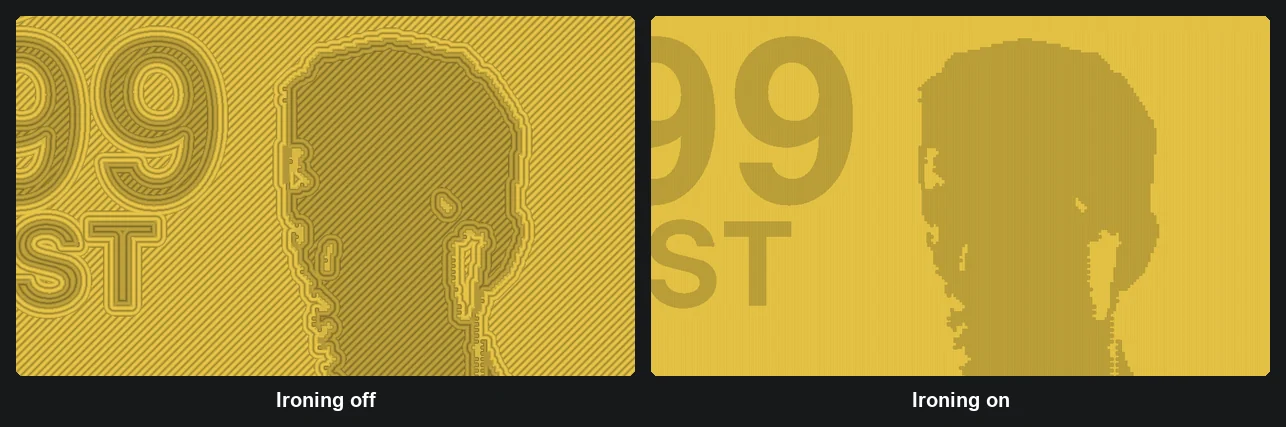
The Print preview shows an approximation of how the nozzle fills each color on the top surface. Choose your nozzle, the wall generator and ironing (the same settings as in Print profile settings), and compare the results. If fine details disappear, make the image larger, simplify it with clean-up or fewer colors, or accept the loss. It is an approximation, not a slicer.
Which side faces the build plate
The downloaded card lies with its front facing up in every style:
- Raised: front up. The relief has to be on top; upside down it would hang in the air.
- Cutout: front up. Upside down, the floor of each engraving would be printed over empty space and sag.
- Inlay: front up or down. Front up, turn ironing on for a smooth top; first-layer flaws stay hidden on the back. Flipped front down in the slicer, the front becomes the first layer, pressed flat onto the build plate: perfectly even, with crisp color edges and the plate's texture (glossy on a smooth plate, matte on a textured one), and no ironing needed. Flipping only turns the card over, so the text still reads the right way round from the front. A clean build plate and a good first layer matter, because any flaw shows on the front.
Step 6: Download and slice
- Download the .3mf. It contains one object per color, in palette order, so filament 1 comes first.
- Open it in your slicer and check that every part uses the filament you expect. Swap the slot assignments if your spools are loaded differently.
- The file carries a default Bambu Lab A1 profile (0.4 mm nozzle, 0.20 mm layers). Select your own printer and profile before slicing.
- The Print profile settings above the download button (wall generator, ironing type and flow) are saved into the .3mf. Check them in your slicer and set them by hand if they are missing.
- Keep the prime or purge tower enabled, as for any multi-filament print.
- Raised and inlay depths print best as a multiple of your layer height. The default 0.4 mm is two layers at 0.2 mm.
Not sure yet? The tool page has a free example .3mf to open in your slicer and try these settings on.
Slicer settings for the best detail
The print preview lets you compare these before you print:
- A smaller nozzle gives better quality. A 0.2 mm nozzle keeps much thinner lines and edges than a 0.4 mm one, at the price of a longer print.
- Use the Arachne wall generator. It adapts the line width to thin features, so fine details such as eyes, outlines and small text are kept. Classic walls leave gaps or lose thin details.
- Turn ironing on for the top surface. The nozzle makes an extra pass with very little flow, which smooths the lines into an even surface, closes small gaps and makes the image look crisper. It adds print time.
Ironing flow: the default (10%) is often too low. In our experience 15% is better and around 20% works best, but it varies a lot between filaments, so test with yours. Raise it in small steps and stop if you see ridges or blobs.
Troubleshooting
- Details are missing: check the print preview, enlarge the image, or lower the resolution and raise clean-up so shapes are simpler.
- The photo looks noisy: set dither to None, or reduce the dither strength.
- Colors differ from the on-screen preview: filament shades vary between brands, so pick the swatch that matches your actual spool.
- It wastes a lot of filament: every color change purges material. Use fewer filaments or a simpler image.